Project NVIDIA JetBot (Orin Nano)
About Project NVIDIA JetBot (Orin Nano)
JetBot (jetbot.org) is an educational robot platform originally designed for the now-discontinued Jetson Nano. While the newer NVIDIA Jetson Orin Nano Super Developer Kit (8GB) offers significantly more computing power, the official JetBot project hasn't been updated since February 2021. The existing documentation only provides an outdated parts list for the Orin Nano, with no software support outside of some other forked repos.
Project Goal: Fully adapt the JetBot platform to work with the newer, more powerful NVIDIA Jetson Orin Nano, including all necessary hardware modifications, software updates, and Jupyter notebook compatibility.
📦 Full Source Code: All updated code, configuration files, and Docker containers are publicly available in my forked GitHub repository at github.com/protomota/jetbot-orin
After extensive testing and code modifications, I successfully adapted JetBot to run on the Orin Nano, including all the original Jupyter notebooks. This post shares my implementation to help others build their JetBots with the newer hardware.
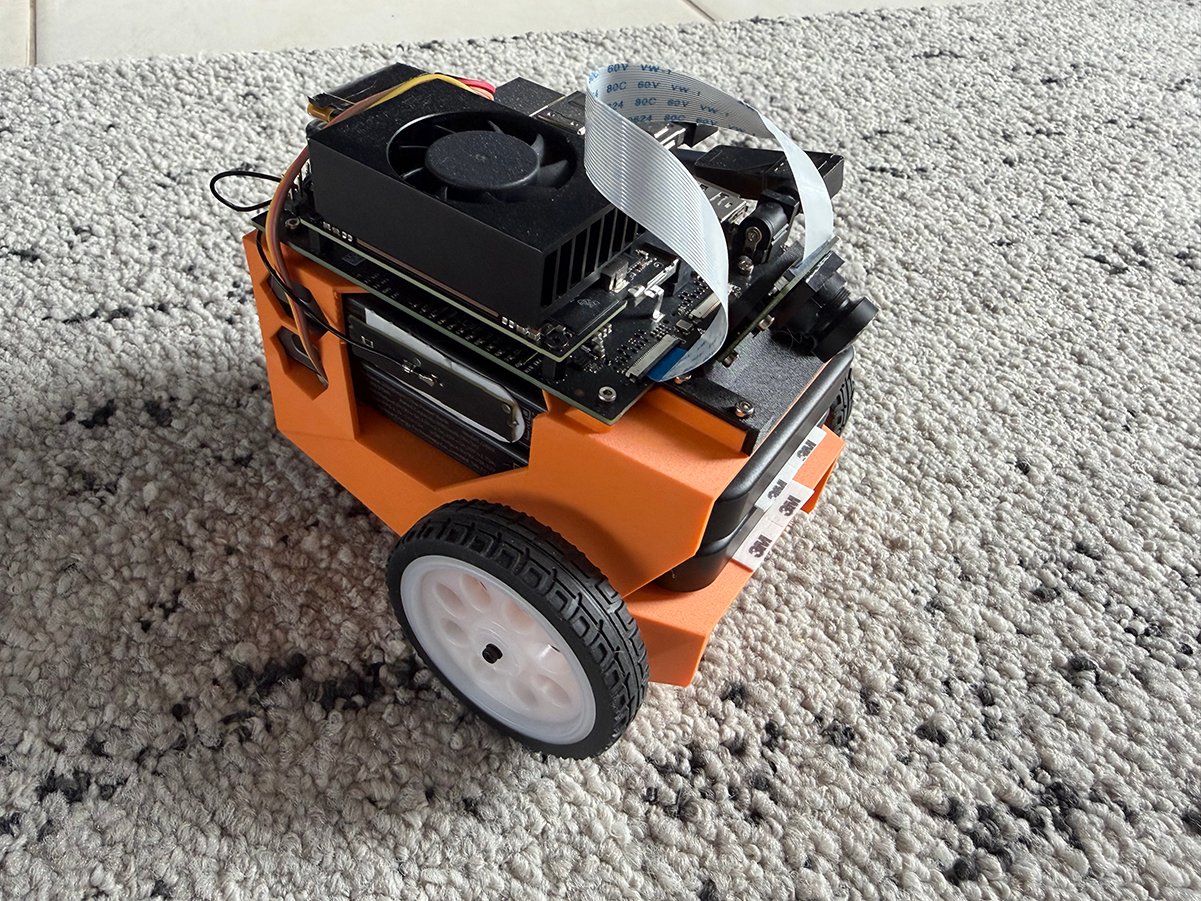
JetBot in Action
Here's the modified JetBot Orin Nano demonstrating autonomous navigation on a toy roadway using vision-based training and machine learning. The robot uses its camera to detect road boundaries and navigate the course in real-time, showcasing the practical capabilities of the Orin Nano's enhanced computing power for inference and decision-making.
The Power Challenge
The biggest hurdle I encountered was the power requirements. The original Nano runs on 5V, while the Orin Nano requires 9-20V. Combined with the motor controller and motor requirements, standard 10,000mAh USB power banks can't deliver this higher voltage reliably. You can power one or the other, but not both. After testing numerous options (and making far too many returns to Amazon), I decided that the best and easiest solution would be dual power banks: one for the Orin Nano and one for the motors and controller. While this adds weight and complexity, the plus side is longer runtime. Until someone starts selling a custom Power Delivery Board desinged for the Orin Nano, this is the best solution I could come up with.
Model Redesign
This presented another problem - the original chassis model only fits one battery. So I needed to modify the battery compartment area of the model to support dual 10,000mAh batteries and then reprint it.
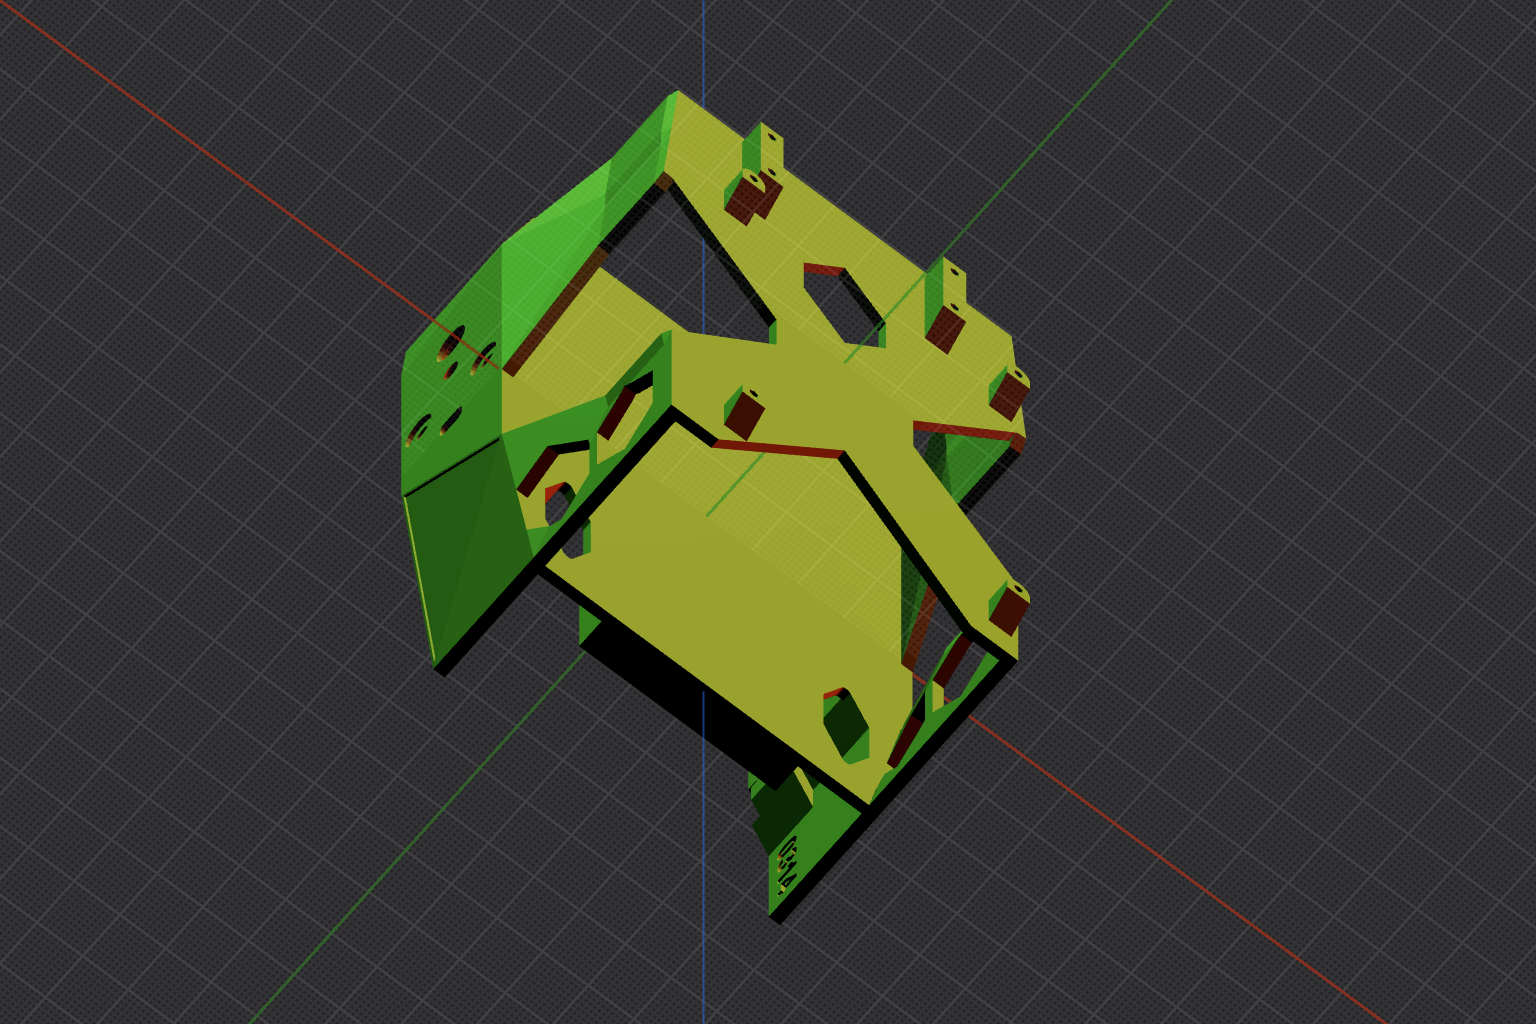
Download the modified chassis with printer settings: chassis-dual.3mf
Download STL only: chassis-dual.stl
Updated Bill of Materials for JetBot Orin Nano
While the JetBot community has updated the parts list for the Orin Nano, the current recommendations are partially outdated and don't properly address the power requirements. While most of the instructions in the parts list are accurate and you will need the parts, the instructions will only get you 80% there. There are many broken links and outdated recommendations. Here are my recommended improvements:
NVIDIA Jetson Orin Nano
- Developer Kit: NVIDIA Jetson Orin Nano Super Developer Kit (8GB) - Our robot brain.
Power Solution
- Power Banks: 2 x 35W 10,000mAh Power Bank - You need two of these. One for the Orin Nano, and one for the motors and motor controller. The larger wattage on this model is also essential for meeting the Orin Nano's higher power demands. 35W will also allow you to run the Orin Nano at full 25W power. This particular model is available under a couple of different names as it is a white label product. This one is particularly cool as the power reading buttons and readout conveniently fit perfectly in the windows of the JetBot.
- Power Adapter: USB-C to DC Adapter - Much cleaner and more compact solution without cable management headaches of the recommended 6-foot cable.
- USB-C Cable: Short USB-C Cable - This plugs into the battery and the power adapter.
Storage Upgrade
Instead of an SD card, I strongly recommend upgrading to an NVME M.2 SSD. This provides significantly better performance and reliability.
Important: Installing Jetpack on the Orin Nano with an SSD requires a host x86 PC running Ubuntu for the reflashing process. ARM-based systems like Raspberry Pi won't work for this.
If you don't have an x86 Ubuntu machine, you can purchase an affordable mini PC for about the same cost as a Raspberry Pi. Install Ubuntu alongside or instead of Windows for the setup process.
I had the idea that it might work in an Ubuntu virtual machine, but I don't know if that is supported. Something to try if you need to.
Getting Started
Follow the NVIDIA Jetpack SDK Installation Instructions to install the latest Jetpack on your Jetson Orin Nano.
Hardware Setup and Motor Controller Configuration
Before running the software, ensure your hardware is properly configured:
Motor Controller Power
The Adafruit MotorHAT/FeatherWing motor controller requires external power (6-12V) separate from the Jetson.
Important: Check that the motor controller has a green power LED lit at all times. Some power banks automatically shut down if they detect low current draw, thinking nothing is connected. If you're using a power bank:
- Use a power bank that supports low-current devices
- Monitor the green LED - if it turns off, your power source has shut down
- NVIDIA does not yet have an official recommendation or solution for powering the Orin Nano from a dedicated battery pack designed for robotics. It is possible, but outside the scope of this tutorial. Venture at your own risk as it has its own set of technical challenges.
Connecting to your NVIDIA Orin Nano
Open your terminal and SSH into your Orin Nano:
ssh jetbot@<jetbot_ip>
I2C Bus Configuration
Since the Orin Nano I2C bus is different (7, rather than the default 1), you need to set the JETBOT_I2C_BUS environment variable:
# Add to ~/.bashrc for persistence
echo 'export JETBOT_I2C_BUS=7' >> ~/.bashrc
source ~/.bashrc
Installing the JetBot Python Package
Create a directory called 'source' in your home directory:
cd ~
mkdir source
IMPORTANT: Clone my forked and updated repository that works with the Orin Nano hardware:
cd source
git clone https://github.com/protomota/jetbot-orin.git
Install the JetBot Python package:
cd jetbot-orin
python3 setup.py install --user
Configure System
First, run the scripts/configure_jetson.sh script to configure the power mode and other parameters.
cd ~/source/jetbot-orin
./scripts/configure_jetson.sh
Configure Docker Environment
Navigate to the docker directory and source the configure.sh script to configure environment variables.
cd docker
source configure.sh
Build Docker Containers
Build all JetBot containers from scratch:
./build.sh
This step is required before running the containers for the first time.
Enable and Start Containers
Enable Docker to start at boot and launch the JetBot containers:
./enable.sh $HOME
The directory you specify (e.g., $HOME) will be mounted as /workspace in the Jupyter container. All work saved in /workspace will persist across container restarts.
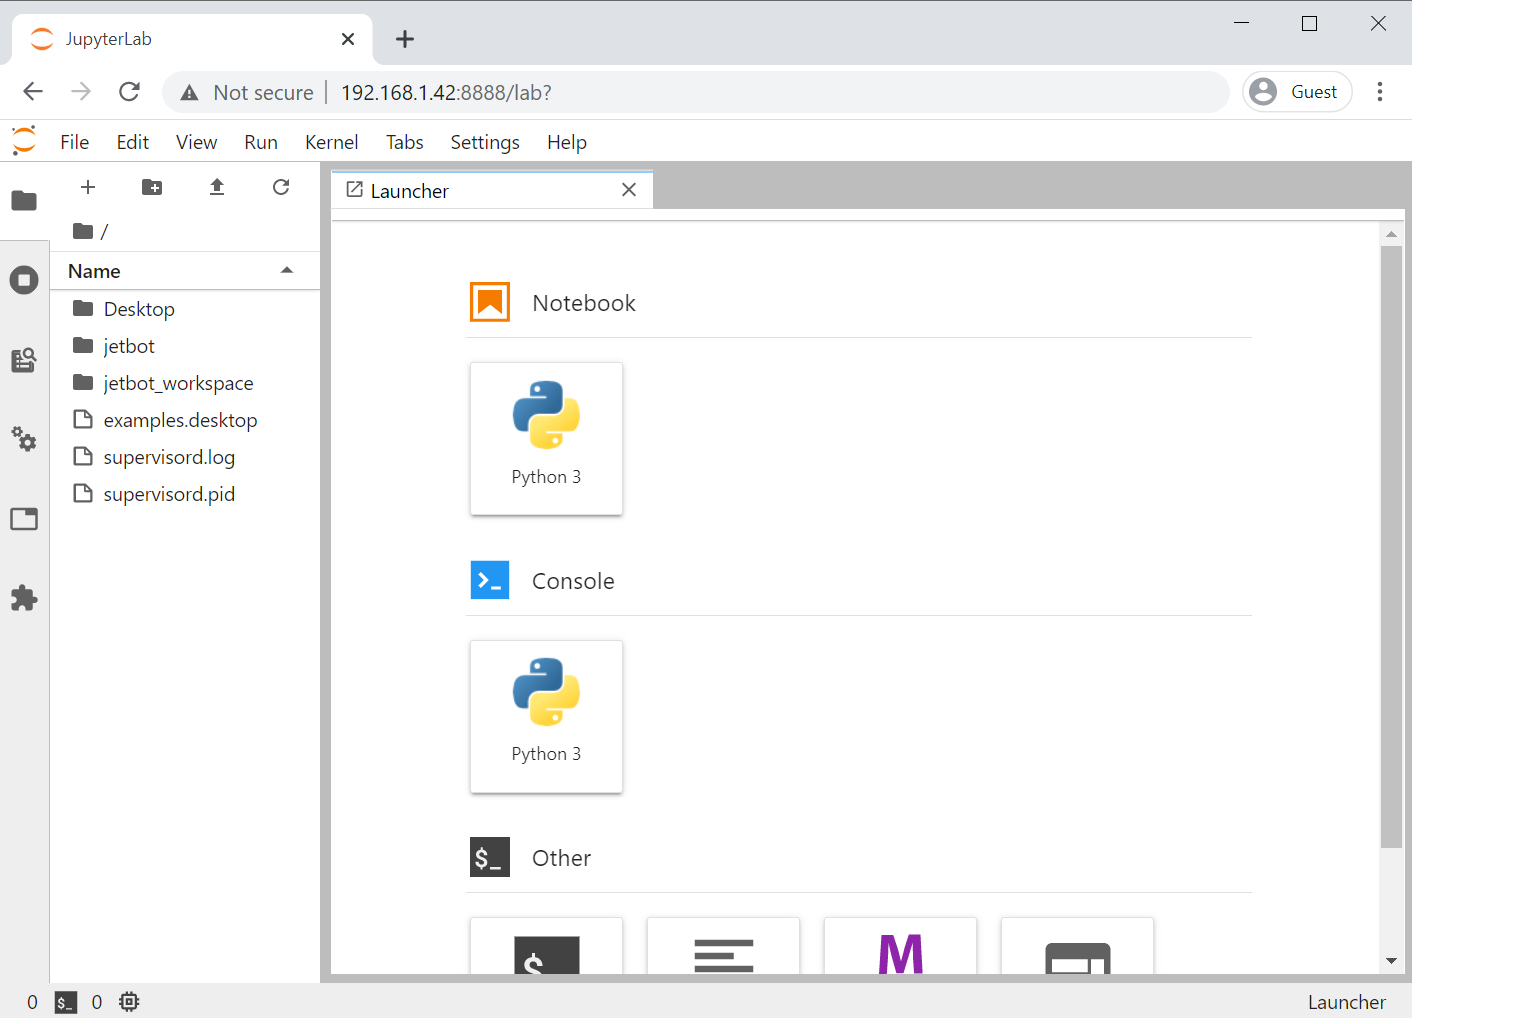
Access Jupyter Lab
Open your web browser and navigate to:
https://<jetbot_ip>:8888
The default password is jetbot.
Optional Configuration
Enable JetBot Python API Support
Run setup (optional, but recommended - only needed if you plan to use JetBot Python APIs outside of Docker):
cd ~/source/jetbot-orin
python3 setup.py install --user
Power Mode (Jetson Orin Nano 8GB)
For Jetson Orin Nano 8GB Developer Kit, we recommend lowering the power mode to 3W for optimal battery operation:
Common Orin Nano power modes:
- Mode 0: MAXN (15W/20W depending on your module)
- Mode 1: 10W mode (power-saving)
- Mode 2: 15W mode
- Mode 3: 7W mode
sudo nvpmodel -m 3
Then verify it worked:
sudo nvpmodel -q
Managing Containers
Stop All Containers
cd docker
./disable.sh
Rebuild Containers
cd docker
./disable.sh
./build.sh
./enable.sh $HOME
Important Notes
- The containers will restart automatically on boot
- Work saved outside of
/workspacein the Jupyter container will be lost when the container restarts - The NVIDIA runtime is automatically configured by
configure.sh - Docker daemon is automatically enabled at boot by
configure.sh